Installation Instructions for Adobe Commerce 2.3+
-
Check system requirements: make sure your Magento platform is running a version compatible with the extension you want to install. You can find this information in the extension’s system requirements.
-
Download the extension: ownload the third-party extension from a trusted provider and extract the ZIP file.
-
Disable Magento cache: access the Magento admin panel and disable the cache. This helps prevent potential issues during the extension installation.
-
Back up your website: before installing any extension, it is highly recommended to create a full backup of your website. This helps prevent issues in case something goes wrong during installation.
-
Install the extension: the installation process may vary depending on the type of extension you are installing. Some providers include detailed documentation. In general, you can install the extension using one of the following methods:
-
Install via Composer: if the extension is available in the Packagist repository, you can install it using Composer. You will need to add the extension as a dependency in the composer.json file and run the composer update command.
-
Install manually: if the extension is not available in the Packagist repository, you can install it manually. To do this, copy the extension files to the appropriate folder in your Magento installation.
-
- If the extension is available in the Packagist repository, you can install it using Composer. You will need to add the extension as a dependency in the
composer.jsonfile and run the command. - Clear Magento cache: after enabling the extension, clear the Magento cache to ensure the changes are reflected on the website.
easypay Module Configuration Instructions for Magento 2.3+
General Settings
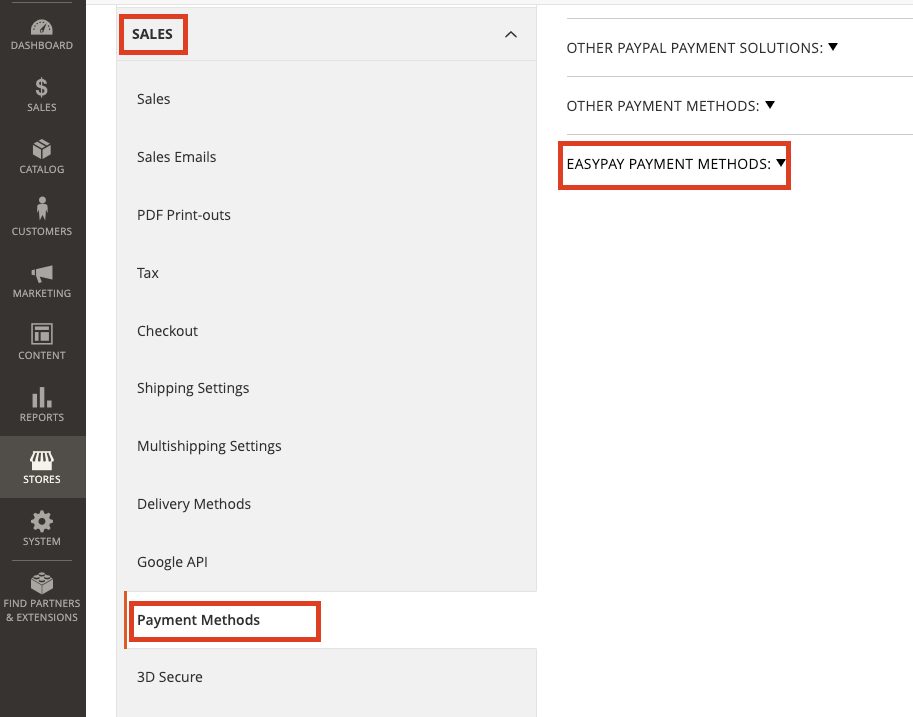
After logging into the Magento Backoffice, go to the easypay Payment Methods section and configure the general settings:
Stores > Settings > Configuration > Sales > Payment Methods > easypay Payment Methods
Module Configuration Options
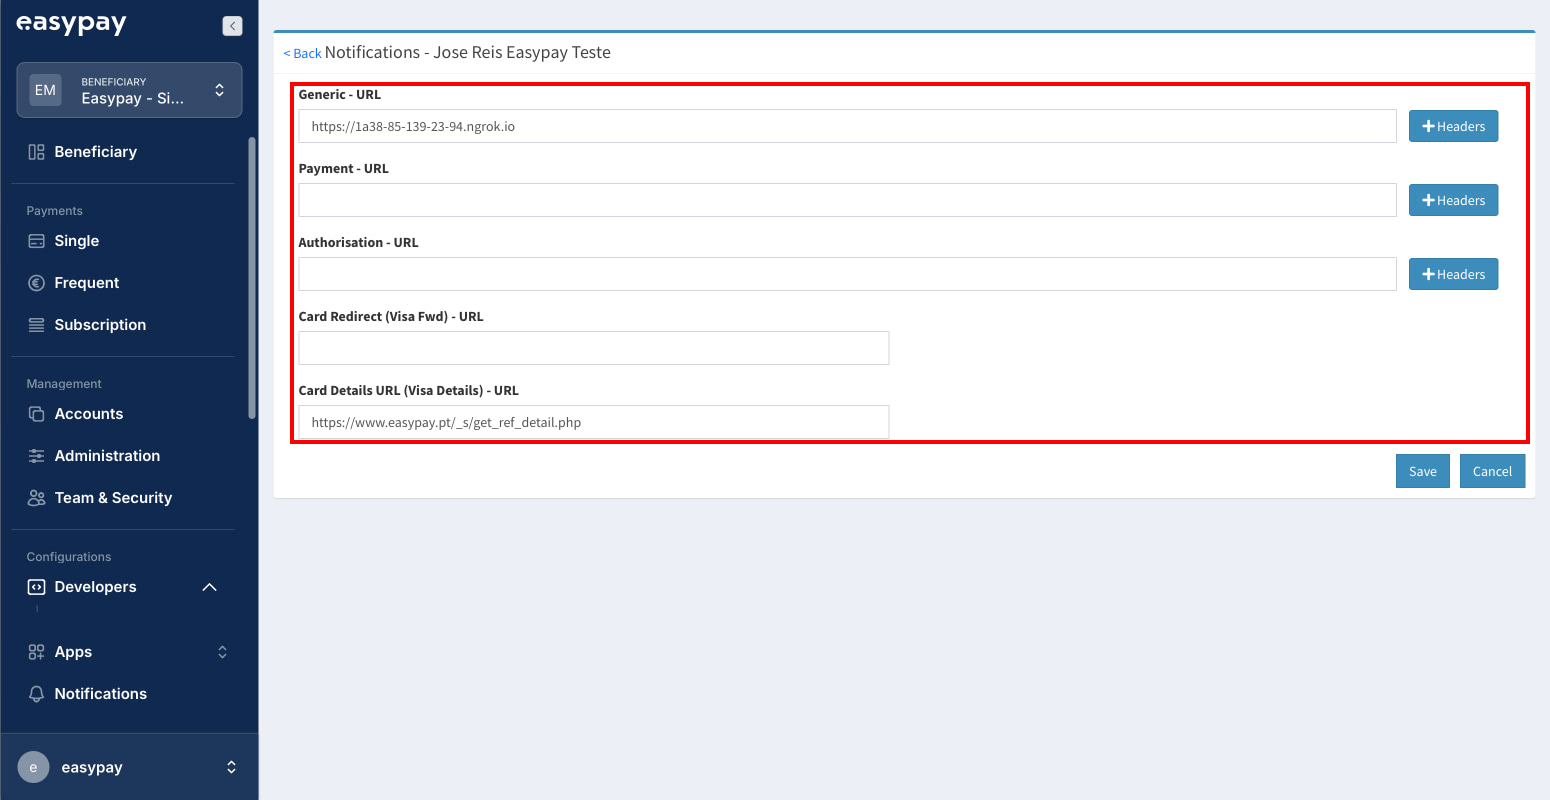
Configure > Webhooks Configuration
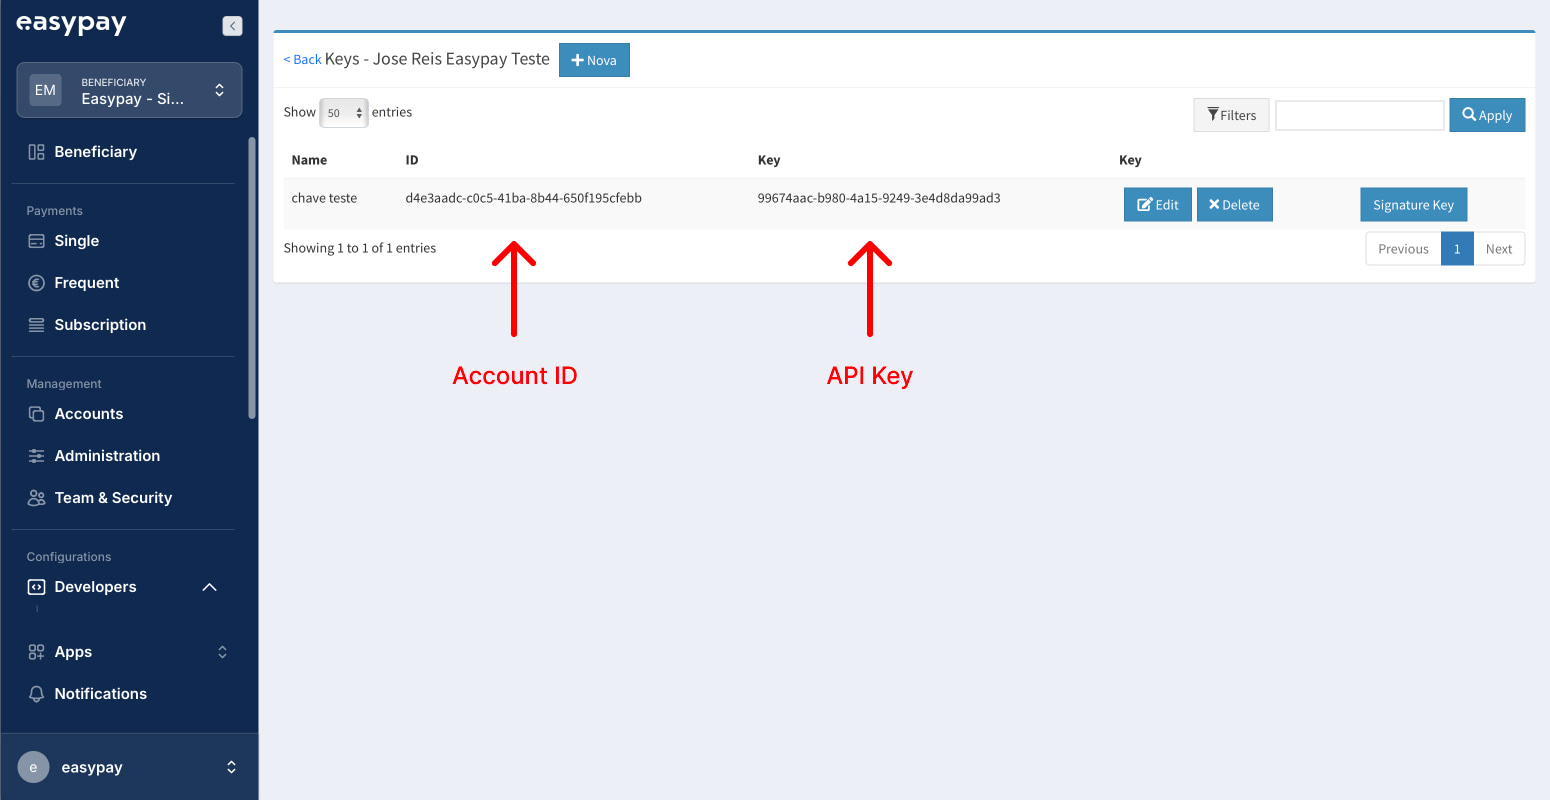
- Account ID and API Key – This information must be filled in with the credentials available in the easypay dashboard for API integration*
- Country – Select the country where the business is based
- Sandbox Mode (Yes/No) – If set to “Yes”, the module will run in a test environment; otherwise, it will run in the production environmentModule Configuration Options
Configure > Webhooks Configuration
-
Account ID and API Key – This information must be filled in with the credentials available in the easypay dashboard for API integration*
-
Country – Select the country where the business is based
-
Sandbox Mode (Yes/No) – If set to “Yes”, the module will run in a test environment; otherwise, it will run in the production environment
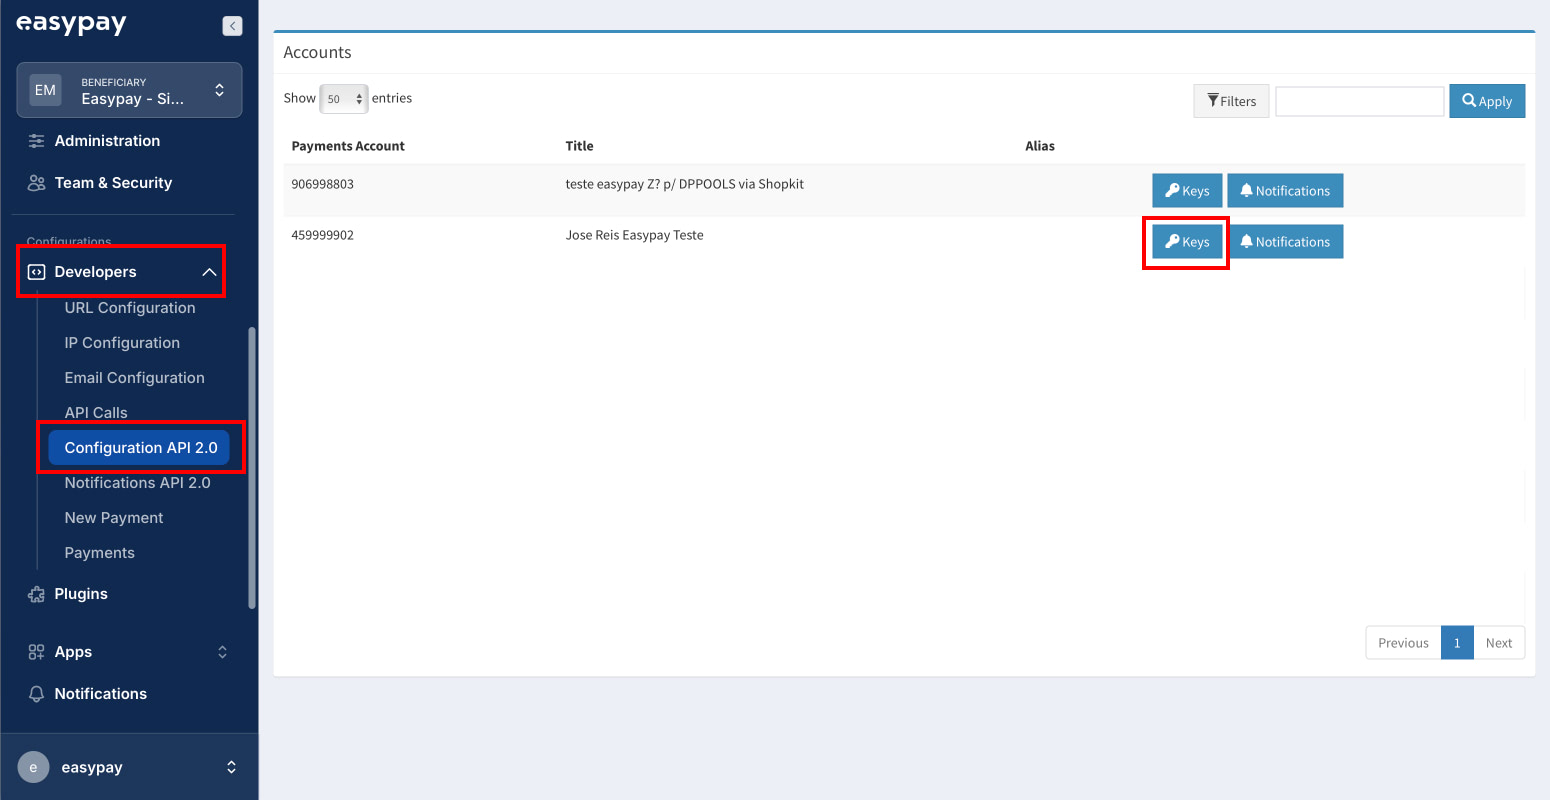
To obtain the Account ID and API Key for the production environment, access:
easypay Production URL: https://www.easypay.pt/pt
To obtain the Account ID and API Key for the test environment, access:
easypay Test URL: https://backoffice.test.easypay.pt
Then log in to the easypay backoffice and follow the next steps:
The access credentials for the Backoffice are the email and password you defined during registration.

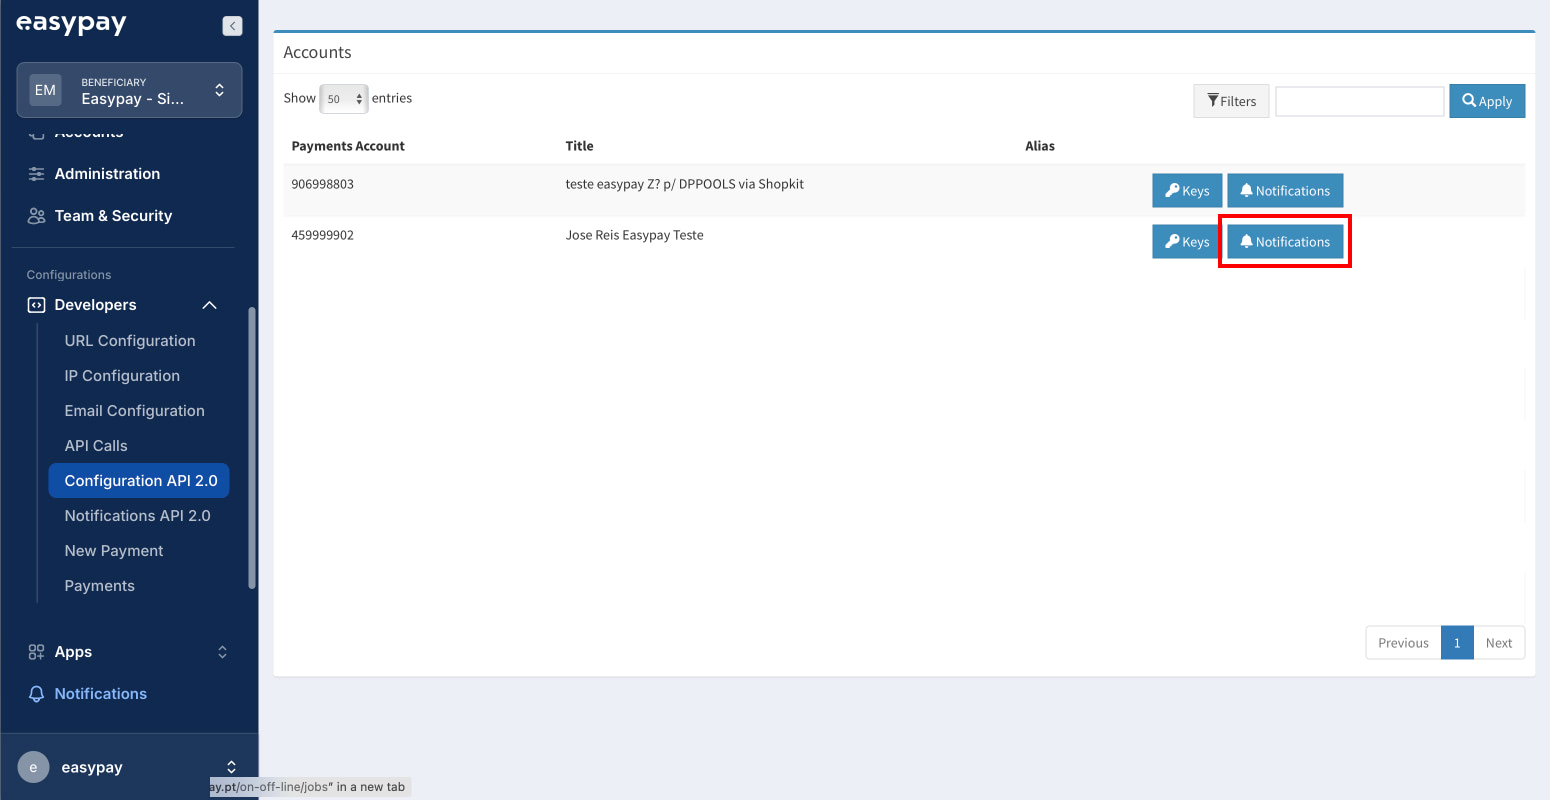
Menu Web Services (1) > API 2.0 Configuration (2) > Keys (3) > Create.

-
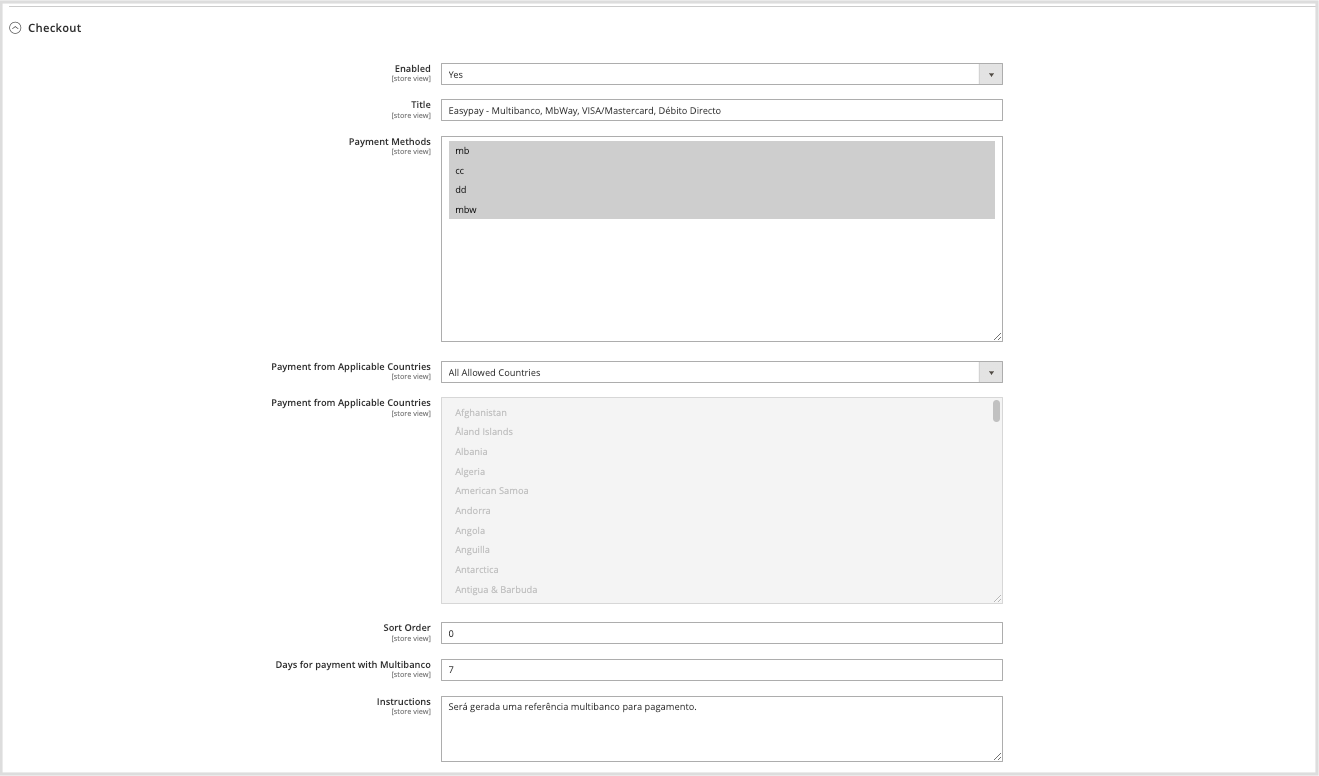
Enable – Enable/disable all easypay payment methods.
-
Title – Configure the description of the payment gateway displayed at checkout.
-
Payment Methods* – Enable/disable payment methods provided by easypay:
-
- MB – Multibanco References
- CC – Visa/Mastercard
- AP – Apple Pay
- DD – Direct Debit
- MBW – MB Way
- VI – Digital IBAN
-
Payment from Applicable Countries – Select the locations where the easypay gateway should be available for payments.
-
Sort Order – Select the position/order of the easypay gateway in the website checkout.
-
Days for payment with Multibanco – Defines how long the Multibanco reference remains available for payment by the end customer. The purpose of this setting is to manage transactional emails informing the end user that the issued reference is no longer available.
-
Instructions – Information regarding the message displayed to the customer when selecting the Multibanco References payment method.
Checkout Customization
In this area, you can customize the styling and colors displayed during the checkout process when the easypay option is selected:
-
Background Color – Select the desired color to apply to the easypay checkout background.
-
Button Background Color

View easypay logs in Magento
Reports > Sales > easypay Payments
