In the easypay Backoffice, you can create user teams with access to the functionalities you define. You can assign different access levels to different users by creating a team.
The ‘Admin’ team has access to all areas of the Backoffice and is created automatically when you create an easypay Payment Account.
Each team can have access to different information and functionalities. For example:
- Level 1 Team – can only access transaction information. Cannot generate payments.
- Level 2 Team – can access transaction information and also generate payments.
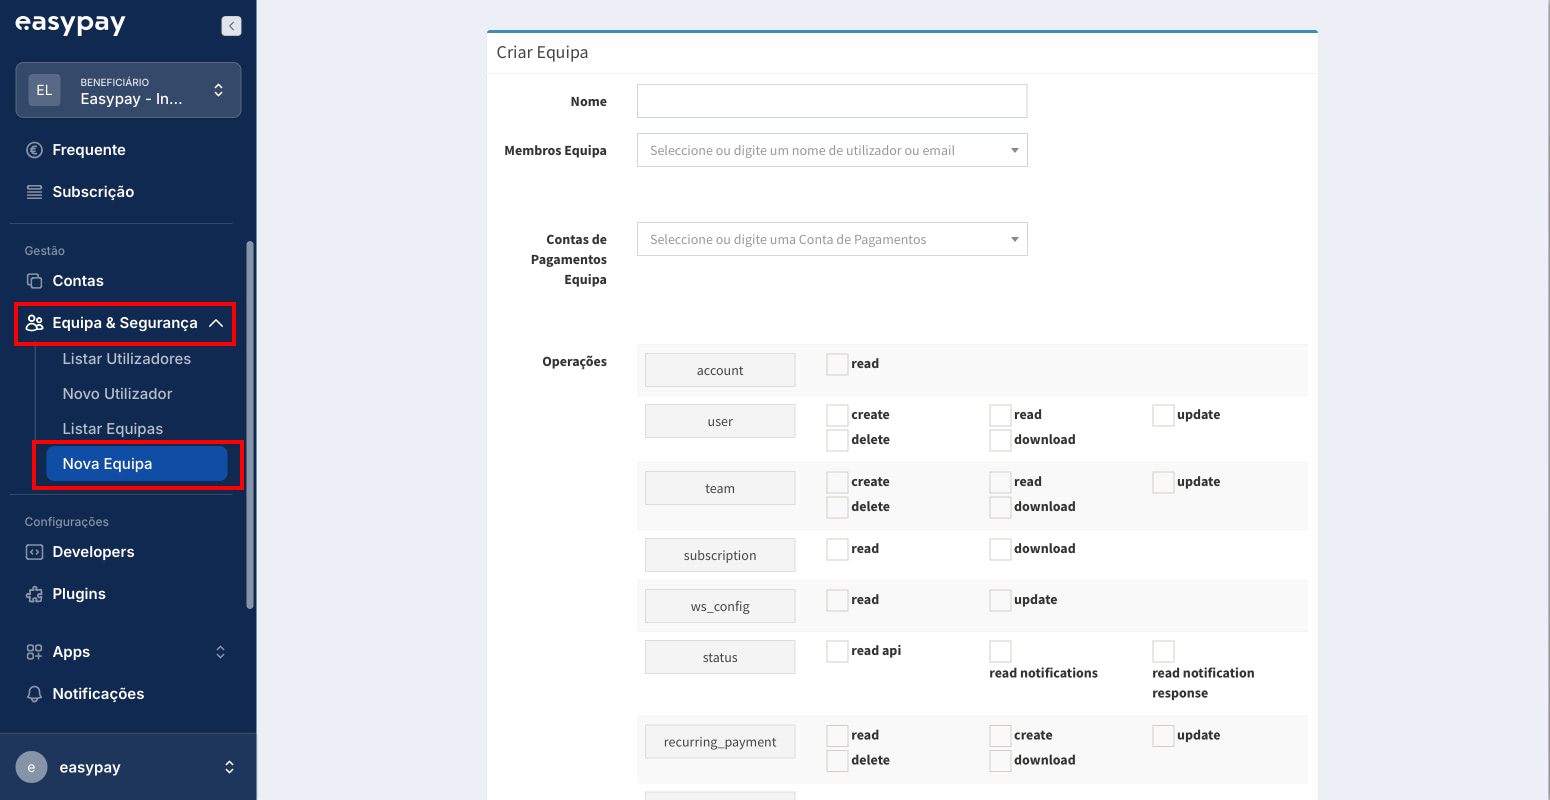
To create a team in the easypay Backoffice:
-
Access the easypay Backoffice;
-
Go to the Management menu and select ‘Team & Security’ > ‘New Team’;
-
Fill in the team name;
-
In ‘Team Members’, select at least one user belonging to the ‘admin’ team;
-
‘Team Payment Accounts’ – Select the payment accounts that the team will have access to;
-
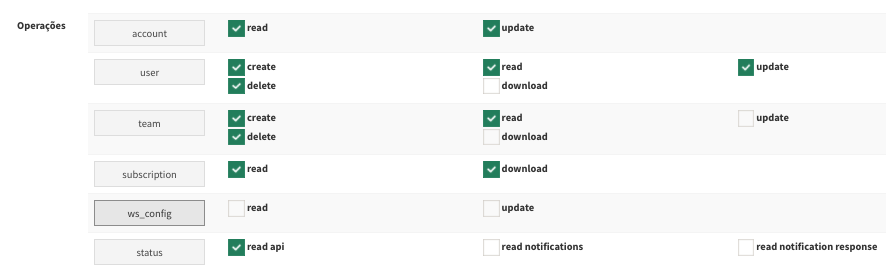
In ‘Operations’, you will find the areas you can grant access to for the team:
- account – Menu “Beneficiary”
- user – Menu “Users”
- team – Menu “Teams”
- subscription – Menu “Subscriptions”
- ws_config – Menu “Web Services”
- status – Menu “Web Services”, access to “API Status”
- recurring_payments – Menu “Recurring Payments”
- quick_easypay – ignore
- multibanco – Menu “Multibanco References”
- form – Menu “Forms”
- easyref – Menu “Payment Account”
- direct_debit – Menu “Direct Debits”
- credit_card – Menu “Credit Card”
- mbway – Menu “MB Way”
- upload spreadsheet – ignore
- api_XY – Menu Upload 2 APIs
- frequent_payment – Menu “Recurring Payments (Frequent)”
- apikeys – Menu “Web Services”, access to “API 2.0 Configuration”
- fastbilling – ignore
- splits – ignore
- fpa – Menu “Commission Account”
- easypay_now – ignore
-
For each area, select the functionalities you want to grant access to, such as:
- read – read
- update – update
- create – create
- delete – delete
- download – download a document
- read notification – read notifications
- print – print
- read notifications response – read response notifications
- archive – archive
- notify beneficiary – notify the beneficiary
- create purchase – create purchase
- capture – capture purchase
- cancel – cancel
- refund – refund
- Submit.