1. easypay
The easypay Add-on for Cegid Primavera allows users to manage payments through the easypay platform directly within the ERP.
1.1 Initial Considerations
Before installing and using easypay, please ensure the following prerequisites are met:
- Microsoft .NET Framework version 4.7.1 or later must be installed.
- The Windows user account that will access the configuration folders must have the appropriate permissions through the Windows operating system.
- This version of easypay has been developed for ERP Primavera v10.10 or later.
1.2 Installation
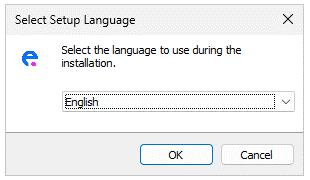
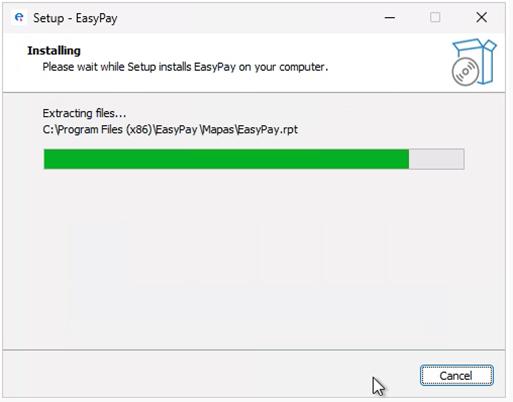
The installation process begins by running the Setup file.
- Select the language you wish to use during the installation process and click OK.
- Click OK.
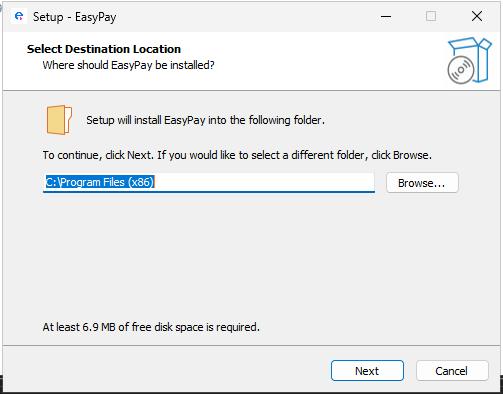
- Click Next.
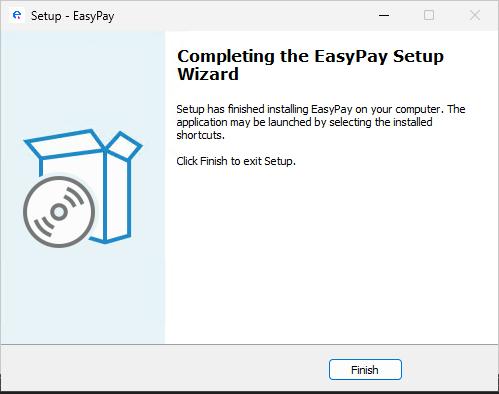
- At the end of the setup process, confirm that the installation has completed successfully.
The installation will place the files required to run easypay in the specified folder.
1.2.1 easypay Installation
1.2.1.1 Importing the "easypay" Extension
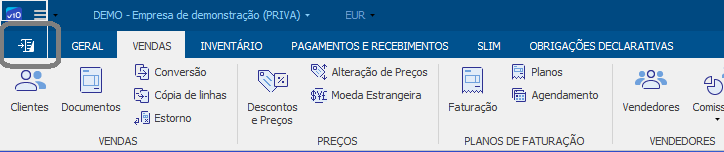
- Open ERP Primavera v10.
- Click the corresponding icon (see installation guide)
 .
.
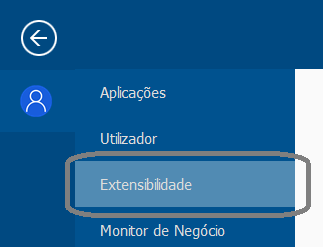
- Select Extensibility.
- If this is your first Primavera integration, click the centre of the window where the message "Choose a file or drag it here" appears.

- If another extension already exists, click the designated button and browse for the file.

- From the easypay installation folder, select the file Easypay.PriExt.v8.dll. Once selected, the extension name should appear in the list.
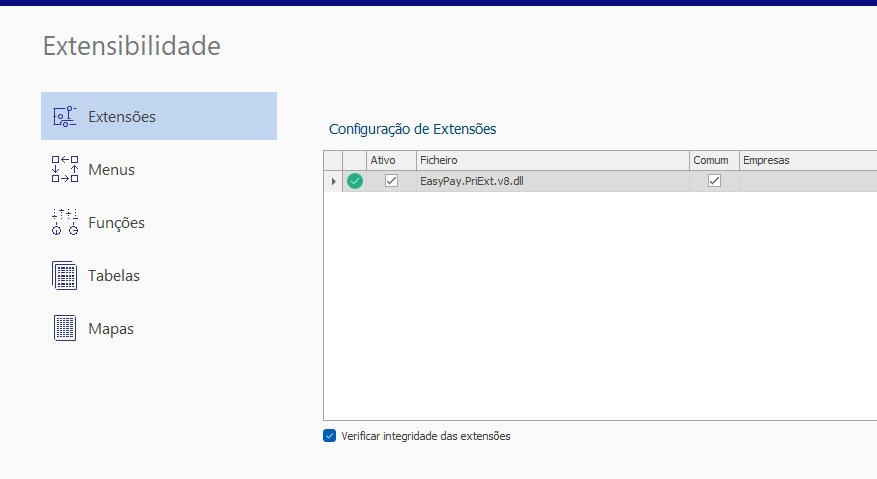
In the Companies column, you can specify the companies to which the extension applies:
- Select one or more companies from the available list. If multiple companies are selected, the description "Various..." will appear.
- If only one company is selected, its name will be displayed.
- If no company is specified, the first time the Easypay.PriExt.v8.dll file is associated, the Common option is selected by default and the extension will be applied to all companies.
After selecting the company or companies where the application should be installed:
- Close ERP Primavera.
- Reopen ERP Primavera.
Once reopened, an easypay menu should be available.

1.3 Initial Configuration
After installing easypay and before first use, several initial settings must be configured.
1.3.1 General easypay Connection Settings
- Open ERP Primavera v10.
- Go to the EASYPAY tab and click Settings.

- The easypay – Settings window will open.
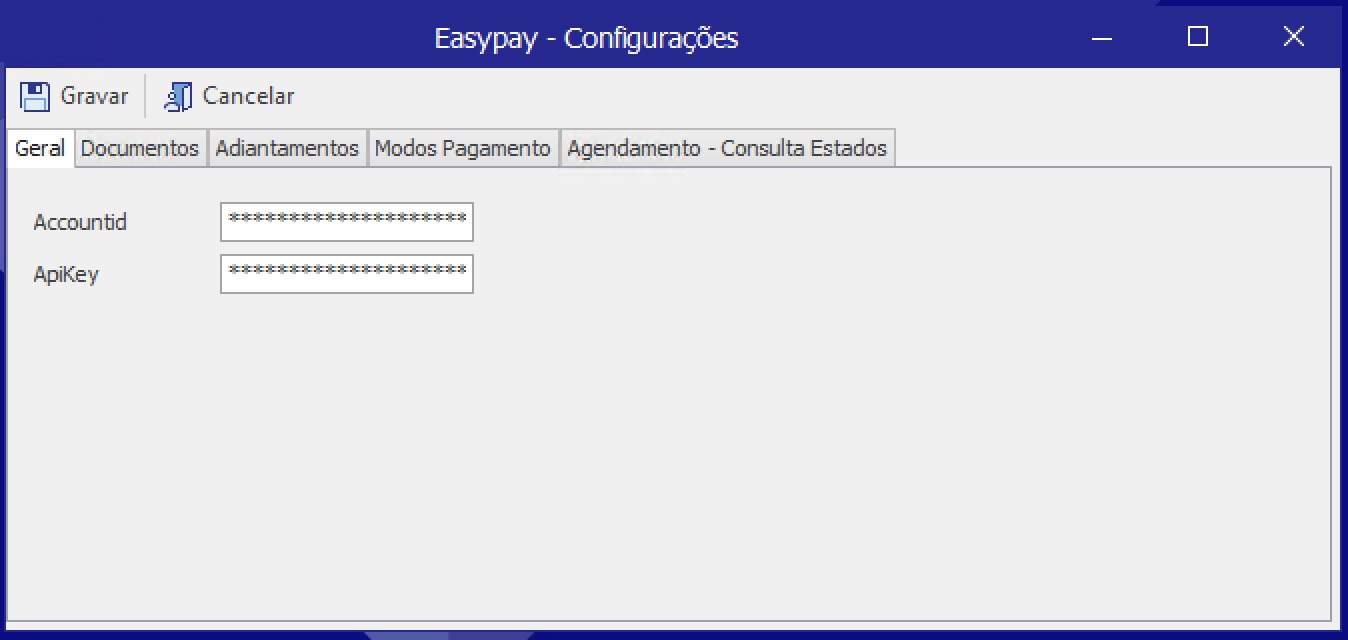
1.3.1.1 General Tab
This section is used to configure authentication with the easypay platform.
- Configure the Account ID and API Key.
- These settings will automatically be inherited by the document configurations.
1.3.1.2 Documents Tab
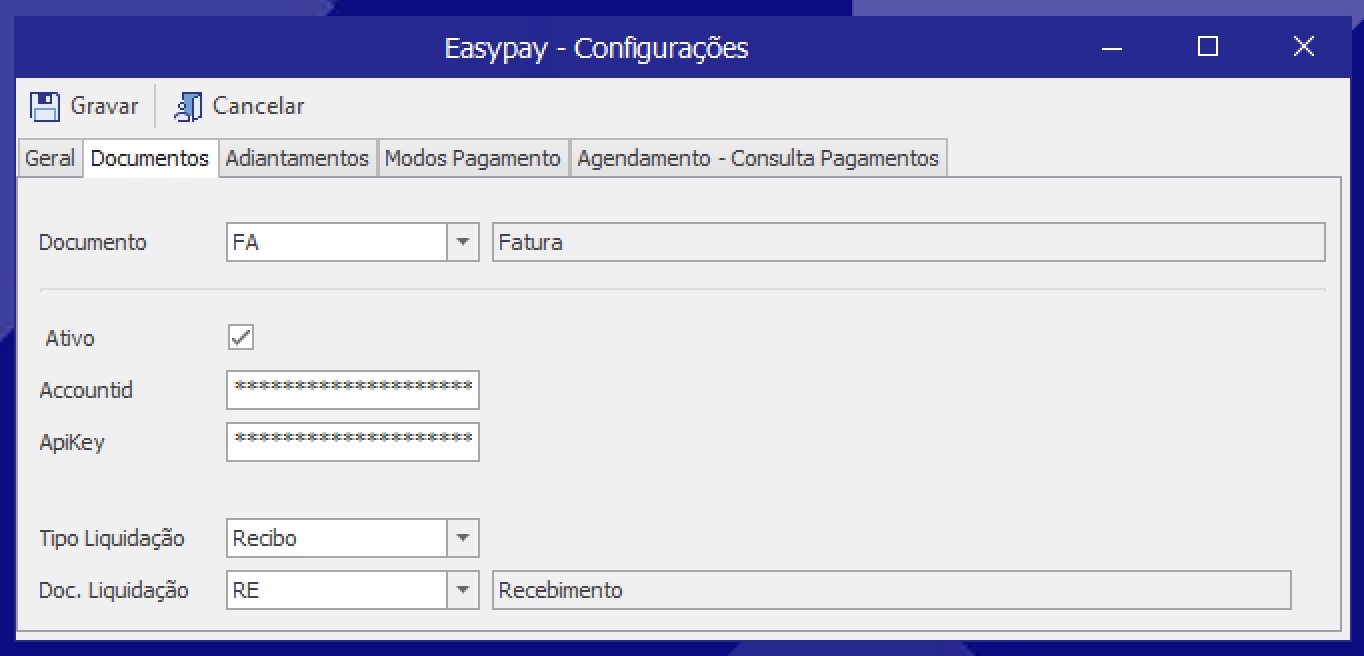
Select the document you wish to configure.
This section allows you to define:
- Feature activation;
- Authentication settings (inherited from the General tab);
- Settlement type;
- Settlement document.
1.3.1.3 Advance Payments Tab

This section is used to configure:
- The Advance Payment document;
- The VAT rate to be applied to documents generated for non-exact settlement amounts.
1.3.1.4 Payment Methods Tab
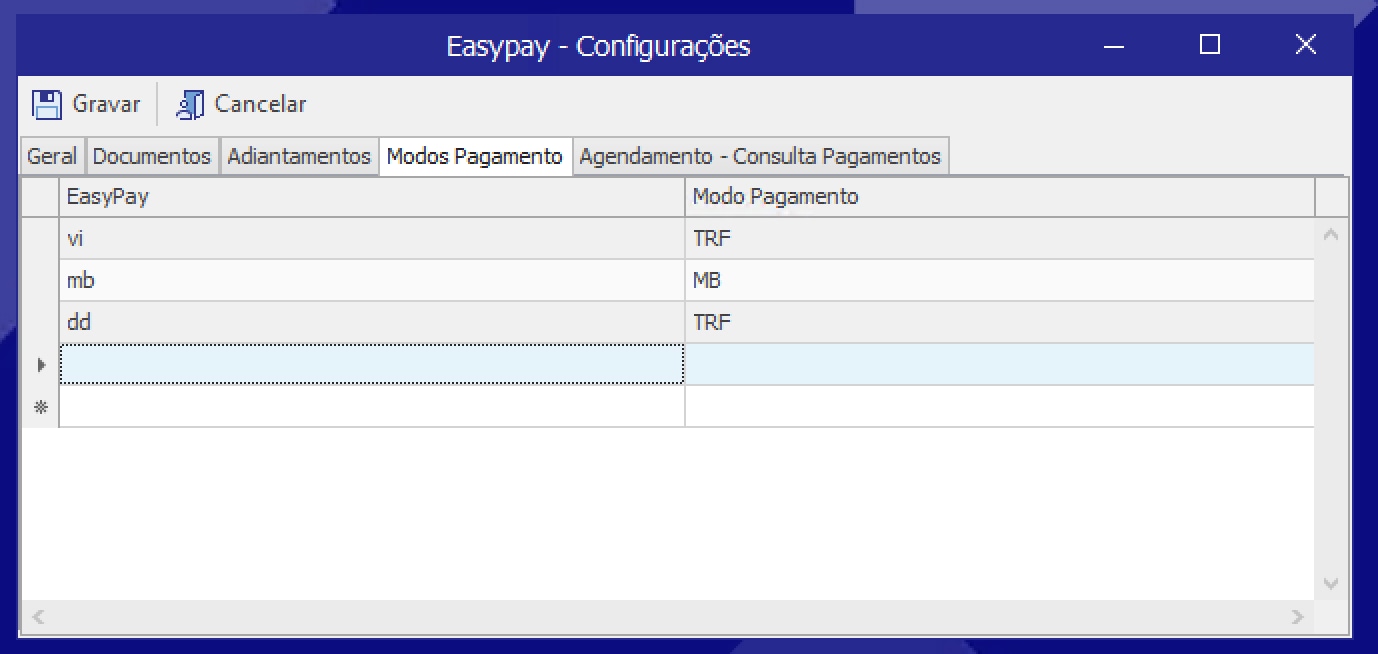
In the Payment Methods tab, map each easypay payment method to the corresponding ERP payment method.
All easypay payment methods must be mapped accordingly.
1.3.1.5 Scheduling – Payment Queries
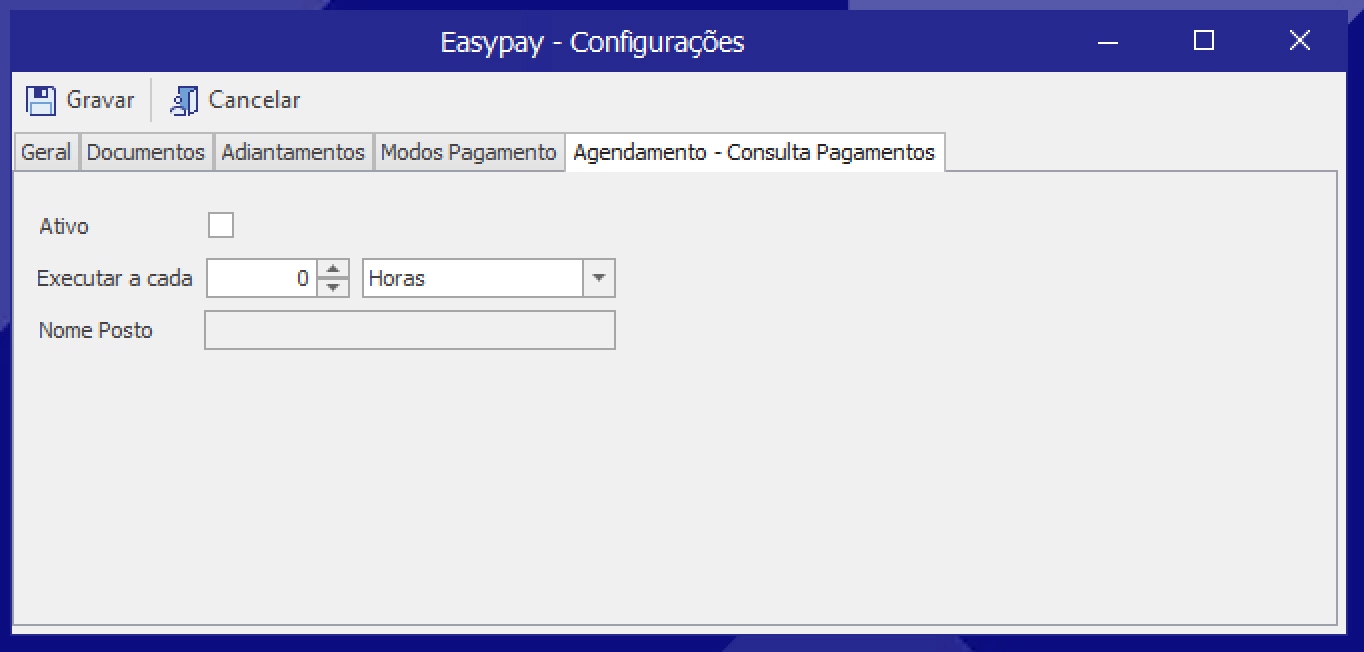
The Scheduling tab allows you to define how frequently easypay payment information is retrieved.
- This feature can only be enabled on a single workstation (it is recommended to use a server).
- To activate it, run ERP Primavera with administrator privileges (Run as Administrator).
2. Usage
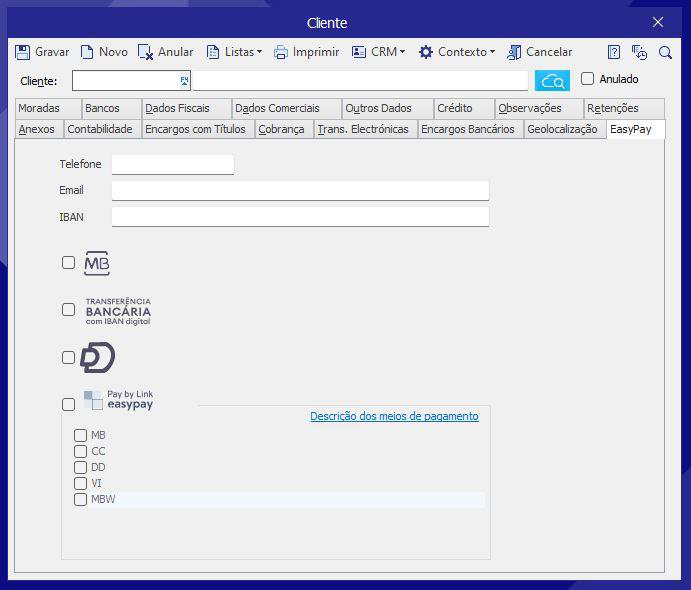
2.1 Customer Creation
When creating a customer record, complete the easypay section by selecting the desired payment methods and entering all required information.
2.2 Sales Documents
The current version supports payment processing through the easypay platform within the Sales module.
After saving a sales document, the corresponding payment processing is automatically performed according to the general settings and the customer configuration.
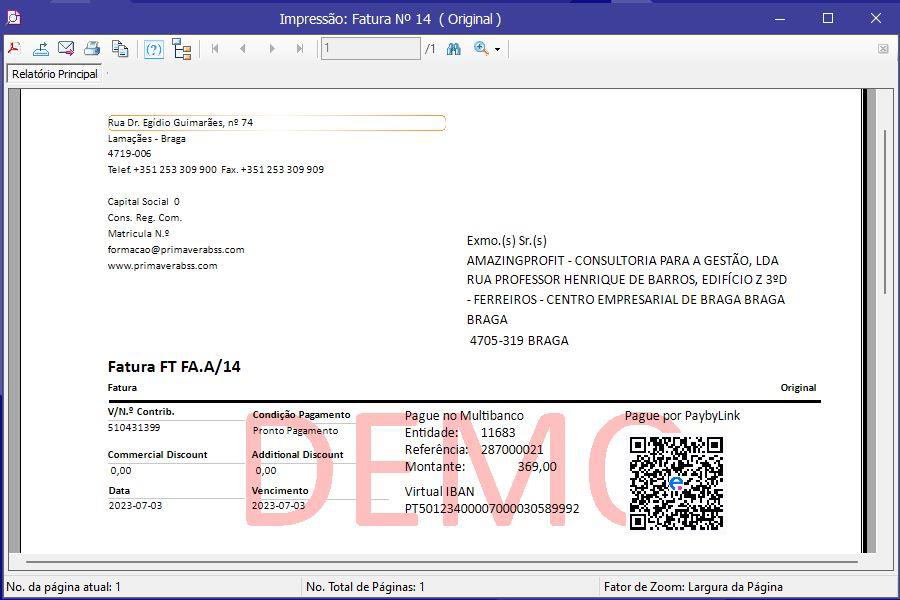
When printing the document, the payment method(s) associated with the customer record will be displayed.
2.3 Print Layout Configuration
The Add-on installation folder contains a Maps subfolder with a sample .rpt report demonstrating how easypay fields can be used.
If you wish to customise your own report, the following fields are available in the CabecDoc table:
- CDU_EasypayEntity – Multibanco payment entity.
- CDU_EasypayReference – Multibanco payment reference.
- CDU_EasypayIBAN – Customer virtual IBAN.
- CDU_EasypayQR – QR Pay-by-Link image (binary).
- CDU_EasypayQRLink – Pay-by-Link URL.
2.4 Document Explorer
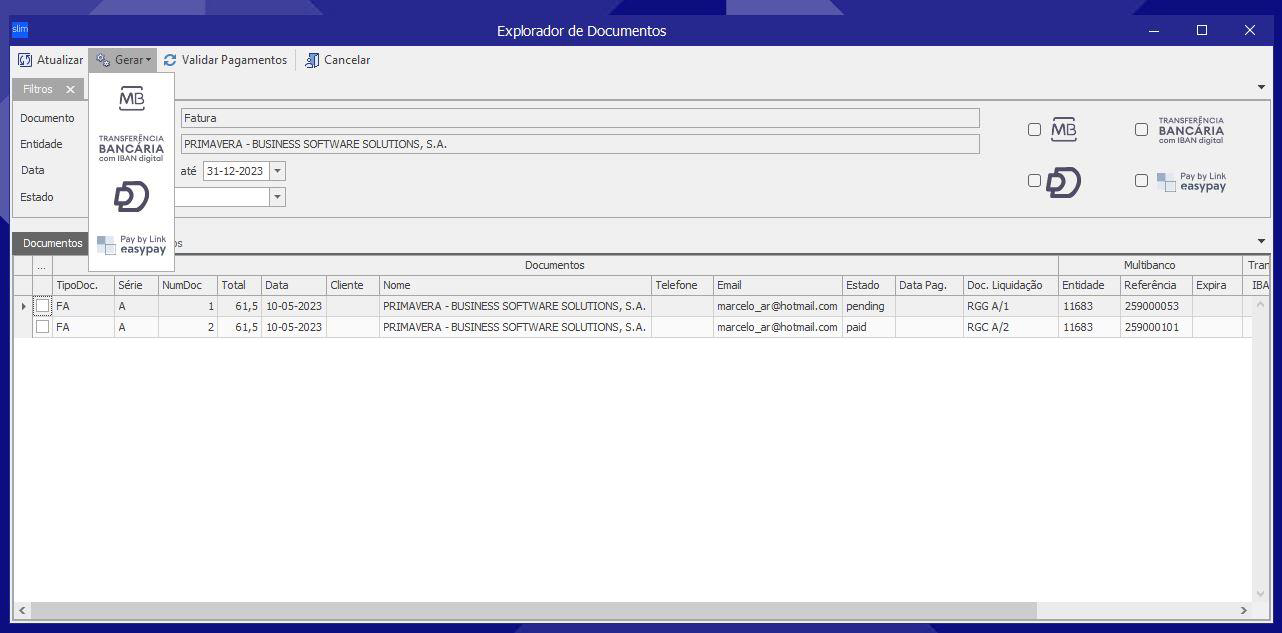
The Document Explorer allows you to:
- View all documents created with easypay enabled;
- Access payment and settlement information;
- Generate new payments;
- View payments processed through easypay.
3. Glossary
Add-on – A software component that extends the functionality of another software application and generally cannot operate independently.
ERP – Enterprise Resource Planning.
ERP Primavera® – ERP solution developed by Primavera.
PDF – Portable Document Format.